Deer Hunting Field

Hunting Blog

  • Hunting
    • Best Coon Hunting Lights
    • Best Treestand Safety Harness
    • Best Hunting Boots
    • Best Rubber Hunting Boots
    • Best Muck Boots For Hunting
    • Best Treestand Safety Harness
    • Best Hunting Spotlights
    • Best Elk Hunting Boots
  • Archery
    • Best Arrow Rest
    • Best Bow Sights
    • Best Single Pin Bow Sight
  • Gun, Shooting & Accessories
    • Best Bipod for Long Range Shooting
    • Best Scope For Ar 10
    • Best Shooting Rest
    • Best AR 15 Bipod
    • Best AR 15 Slings
    • Best ACOG Clone
    • Best Shot Timers
    • Best Rifle Bipods
    • Best Shooting Tripods
  • Survival
    • Survival Shelter
    • Finding and Purifying Water in the Wilderness
  • About Us

Editor’s Pick of the Year for the Best Turkey Decoy

Editor’s Pick of the Year for the Best Turkey Decoy

Enticing a mature tom into your hunting rendezvous is one tricky task that does not only require the most reliable hunting gears and turkey vest, but it also requires the proper and efficient ways to use decoys.

This article provides all the needed information for you to consider in choosing the best turkey decoys. Also, we will be sharing our editor’s pick of the year among the five best contenders which we will review individually to help you have an easier way to decide which one to get.

Image

Product Name

Price

Score

71rVWjGfAGL. SL1500

Miss Purr-fect by Montana Decoy

$$

95/100 View Product
81RDzqK ceL. SL73

AvianX Breeder Turkey Decoy, Camo

$$$

92/100 View Product
81joLAjXTyL. SL73

Primos Gobstopper Jake & Hen Decoy Combo

$$

90/100 View Product
814jZy2JZ L. SL73

AvianX Lookout Turkey Decoy, Camo

$$$

87/100 View Product
81w DBqhgUL. SL73

AvianX Jake Quarter Strut Decoy, Camo

$$$$

83/100 View Product

The Essence of Decoys

Allure and interfere is the primary game plan of almost all bait users basing their tactic on the two main principles of decoys, and that is to gain attraction and to distract your desired toms. Attraction is critical as this will help you lure the turkey to your shooting zone. It allows you to get the attention of the toms and for you to prepare for the kill. Here, you can focus on the mating drive or the aggressiveness of the turkey to get their attention by using a hen decoy or a jake/tom decoy.

Decoys are very efficient to be able to distract your target since its full attention is directed to the decoy, making it a lot easier for the hunter to make small movements and get ready for the kill.

With these being said, it is only very imperative to know the proper placement of the decoys to maximize its full potential and essence. The goal is to place the decoy in a way which will not lead the tom directly in line with you, so you will have some room to make movements without exposing yourself to the target.

What to Look for in a Decoy?

This article aims to provide you the basic knowledge that you will need to choose the best turkey decoy for the money. Also, we will provide you our most honest turkey decoy reviews to further narrow your choices down. So, read on and learn the following factors.

Weight

This factor should be considered especially for those who will be hunting in remote and distant places. This will permit you to move freely and save energy while on the way to the hunting site.

Easy to set up

Most often than not, you will encounter a target which will require you to set up your decoy quickly. Thus, a decoy that does not offer complex steps will be the best one for you determine the fail or success of your plans.

Consider the Soil Type of your Hunting Site

Of course, everyone does not want to go on a turkey hunting trip bringing a decoy that does not fit with the kind of soil of the hunting field. Rocky soils require sturdier stakes that will not break upon setting up.

Realistic Decoys

Since decoys are for attention and distraction, it is always best to use the most realistic one that can lure your targets. Turkeys, like human beings, are very particular with body language which provides hints to other birds as to their current state. Thus, the most realistic-looking one can lure other birds more efficiently.

Positions of the Decoy

It is always best to know what the specific positions of the decoy mean and when is the best time to use them. So, you might need to read the following discussion for you to learn this one of a kind knowledge.

1. The Head Up Position

Turkeys during early seasons are still very active when it comes to breeding and are obviously very vocal. Thus, a head up positioned decoy can be used during this season.

Head position can be perceived by other birds as a sign of activeness and alertness. This could mean that your decoy is looking out for other companions or is squeaking to find a gobbler.

2. The Relax Position

This is very suitable for hunting sites with tall grasses, and hays since the relax position usually indicates a walking bird and these grasses and hays adds the illusion that the hunter is trying to create. A decoy, in a rest position but is not moving may appear unnatural to the bird and may cause mission failure.

3. The Feeding Hen Position

This is best recommended later during the hunting season, but hunters may still opt to use it anytime. You can combine this decoy with the occasional clucking, purring or yelping to lure gobblers.

4. Full Strut Decoy

This decoy can be used in an area with many gobblers fighting for their territory so that it can create a natural illusion for your target bird. Using this decoy can either make or break your mission since it can result in a less dominant bird to back away and abort your mission or will go exactly as how you planned it to be.

5. Silhouette Decoy

This is highly recommended to be used in wide and open spaces since a combination of hen, jake and gobbler is expected to result in a more realistic view and a more enticing gathering for your target bird to join.

Above listed are the most common types of decoys used by successful hunters. Now that you have already understood their usage and the perfect time for these decoys to be used, it is about time for you to scrutinize the best five turkey decoys  in the market which we will be reviewing below.

Top Five Best Turkey Decoy On The Market

Miss Purr-fect by Montana Decoy

71rVWjGfAGL. SL1500

Via: Amazon.com

Miss Purr-fect decoys are known for its realistic features and poses making it one of the most popular decoys in the market all over the world. Upon looking at it, you will get a satisfying feeling that birds will be enticed with it. The general design and even the small details in its feathers are well crafted.

The best thing about this decoy is that it provides freedom to its user to adjust its pose as he prefers through the leg pole system. With this, the user can change the decoy to stand, to pose like it is nesting, feeding and among others. The wirings inside permits the movement of the neck and head making it very flexible to be adjusted according to the pose you set.

Pros

  • Provides a believable feather movements especially during windy days
  • Provides maximum camouflage because of the feather covering its entire body
  • Options for some poses through its two leg pole system
  • Movable neck and head through its internal wirings

Cons

  • The tail drags on the ground preventing movement regardless of the pose

AvianX Breeder Turkey Decoy, Camo

The Avian-X Breeder Turkey Decoy is one of the most lifelike and operative decoys in the market because of its Lifelike Collapsible Decoy feature. It guarantees a 100% realistic look through its very detailed feather that will surely lure your gobbler.

This provides a receptive position of a hen with plunged wings and in a squat position which entices a target thinking that the decoy is ready for mating. It is made with high quality and durability as it is made of Dura-rubber and promises longevity without wearing or denting.

Aside from its quality, this decoy also boasts its ability to be transported with ease and comfort as it allows its users to inflate and deflate instantly. It is also very easy to set up without any hassles and without the need for the hunter to waste his precious time.

Pros

  • Lifelike Collapsible Decoy feature
  • Highly durable as it is made of high-quality materials
  • Guarantees longevity
  • Easy to carry around
  • Easy to set up

Cons

  • Air leak could be an issue

Primos Gobstopper Jake & Hen Decoy Combo

Primos Gobstopper Jake and Hen Decoy Combo are well known for its incredible high definition and very detailed paint job which makes it realistic to look at compared to other decoys in the market. The best thing about this decoy is that it is very easy to be carried around because of its lightweight nature.

Also, it is very easy to set up making it very convenient for the hunter to focus more on hunting instead of working on a complicated decoy installation. Since this is a combo product, you can be assured that you will be able to save few bucks since you will be getting two decoys while paying only for one.

Pros

  • It has detailed paint that gives it a more realistic look
  • Features multiple stakes that make it spin and shake free
  • Comes with a mesh carry bag for an easier carriage
  • It is very lightweight and can be collapsed making it simpler to take anywhere

Cons

  • Very rigid
  • Does not offer the same realistic nature as the Miss Purr-fect brand

AvianX Lookout Turkey Decoy, Camo

Just like all the other Avian-X series, this Lookout Decoy has an excellent and very lifelike paint and feathers that are professionally laid out. It can be stored easily as it can be inflated or deflated without any troubles. This has been well designed and well-crafted as it is made with Dura-rubber that gives assurance that its shape will stay amidst the inflation.

This boasts durability as it is made from high-quality materials and guarantees to withstand dents and wearing off. You can set it up on your hunting adventure hassle-free, and it will allow you to carry it with you anywhere because of its very portable and lightweight nature.

Its posture, looking like a lost hen searching for her man will surely excite your target tom to come running towards her and assuring your kill.

Pros

  • Strong and durable construction
  • Comes with a bag for easier transport and portability
  • Boast a one-piece collapsible stake for realistic motions
  • Incredible realistic looking

Cons

  • Quick losing of air
  • Easily deflated when hit by a stray pellet

AvianX Jake Quarter Strut Decoy, Camo

This decoy offers durability as it is made of Dura-rubber and its construction boasts a real-life Jake upon inflation. One can assure that this decoy will not be able to gain any punctures and dents because of the high-quality materials used to construct it. It is undoubtedly capable of surviving for years.

Its deflated form allows the user to carry it around with ease and comfort plus the cotton bag that it comes with. It is very convenient to use and set up anywhere adding comfort and ease to the hunter’s adventure. The design of its feathers is impressively well-thought of which results in a more realistic outcome making it a more efficient decoy.

Pros

  • Well-constructed design
  • Highly durable
  • Features portability and easy installation
  • Features realistic feathers and high-quality paint schemes

Cons

  • There are deflation issues
  • Expensive compared to other decoys in the market.

Conclusion:

These are the top five best decoys in the market which you can consider and you will not likely be disappointed with these five brands. Consider all the factors we have discussed above and choose the best decoy which has met all your preferences. The in-depth review we have discussed earlier will guide you to choose your preferred decoy without worrying and regretting.

Read more: The 10 Best Turkey Hunting Boots

Basing from the review we have discussed above, it is very evident that the Miss Purr-fect is the winner among the five brands. It has the most believable features that can surely attract the toms which is a great deciding factor for decoys.

In addition, I like the idea that it allows freedom for its users to adjust it according to the user’s preferred poses and its ability to move its neck and head because of the inner wirings which is a distinct feature of Miss Purr-fect that can never be found in other brands.

This article hopes to give you the most honest review and genuine guidance as you take this exciting world of turkey hunting. Thank you for taking your time reading this and we hope that we have fulfilled our promise of providing knowledge and expertise to our readers.

Filed Under: Turkey Huning, Hunting Gear & Accessories 02:43 by Kevin Steffey

A Comprehensive Guide on How to Make Exploding Targets

A Comprehensive Guide on How to Make Exploding Targets

So you are a shooter but are perhaps looking for some extra zing in your target practice. Fed up of just shooting targets that just stand there and look at you at 30 yards wondering whether you have hit or missed? Well, I’ve got a good idea which should put give you an extra bang for your buck with this guide on how to make exploding targets

The primary purpose of an exploding target is that you can see whether you have hit your target or not without having to walk all the way to the target.

Exploding targets (also known as ‘binary’ targets) are not a new concept and are commercially available at a cost. These targets use ‘tannerite,’ an explosive powder also available separately. However, once you read what I have to say here, you will realize how much cheaper it is to make your exploding targets. And it is not complicated either.

A word of caution before actually getting into the subject, as you will be producing explosives, you need to exercise extreme caution and follow the instructions carefully. Also, you should be aware that once you prepare the explosive mixture, it should be used at the site, as it’s illegal to store or transport it.

More…

Quick NavigationWhat You Will NeedSourcing Your SuppliesProcedure To FollowSafety PrecautionsYou Are Now Ready To Go!

What You Will Need

Most of the items are readily available on the open market:

  •  Ammonium Nitrate (95%)
  • Aluminum powder (5%)
  • Weighing Scale
  • Spoons for handling powders – 2
  • Anti-static mixing bag (self-sealing)
  • Air-tight containers
  • Rubber Hand Gloves
  • Safety Goggles
  • Empty plastic containers
  • Two-sided tape
  • Scissors for cutting the two-sided tape
  • Dust Mask

Sourcing Your Supplies

You can get ammonium nitrate from a garden supply store. Aluminum powder is readily available on the internet, and you can buy it from a source like eBay for as little as $8.00 a pound. If you are a bit enterprising you can even make your aluminum powder which will turn out cheaper in the long run, but you will have to enhance your setup a bit – a blender and a ball mill being the main additions.

You will find rubber hand gloves, and goggles at a safety store and you can procure the remaining items at your local hardware store. You can buy the scissors and one-sided tape from any stationery store.

Procedure To Follow

There are two ways that you can use exploding targets. One way is to use small, round plastic containers filled with explosive powder and stuck with two-sided tape at different positions on a regular target. They need to be small and light, probably sufficient to hold about 20 to 30 grams of powder.

The other way is to use a larger plastic container filled with the explosive powder and shoot directly. In this method you will not need to use two-sided tape.

In the procedure below, we will assume that the targets we will use the first method that is sticking plastic containers onto the target.

  • 1. Weigh 95 grams of ammonium nitrate powder on the weighing scale.
  • 2. Open the mixing bag and fill it with the ammonium nitrate powder
  • 3. Now weigh 5 grams of aluminum powder.
  • 4. Add the aluminum powder to the bag
  • 5. Seal the bag tightly and mix the two powders by gently shaking the bag until the mixture is a single color
  • 6. Use your scissors to cut the two-sided tape into small squares
  • 7. Stick one side of each square of two-sided tape to the bottom of the plastic containers
  • 8. Now open the containers and gently fill each one with closely-packed powder
  • 9. Remove the cover from the two-sided tape and stick each container on the target along the concentric circles of the target
  • 10. Your exploding targets are now ready to use

Tip: For quantities more than 100 grams, just multiply the required amount with the number of times more required for each powder. So for example, if you want 5 times more the quantity, just use 500 grams of ammonium nitrate and 25 grams of aluminum powder.

Safety Precautions

Target Practice

You may find this section a bit tedious but trust me; it is what will keep you safe throughout the whole process. You must bear in mind at all times that once mixed, the powder is extremely sensitive and can explode unexpectedly if not handled with care. So just follow these simple precaution to have an enjoyable and safe experience with exploding targets:

  • Always carry the two powders separately and only mix them together when you are at the shooting site
  • While handling the material and shooting wear safety goggles
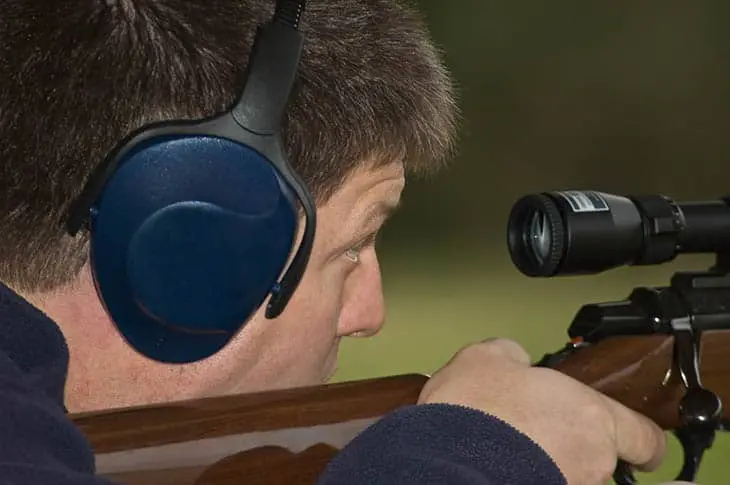
  • Use ear protection while shooting at the targets
  • While handling the powders, use a dust mask as inhaling them can be hazardous
  • Choose a remote and open area for your target practice
  • Ensure adequate distance between you and the target – maintain at least 30 yards for the smallest one
  • Check the proximity of the nearest neighbors – you don’t want to get booked for disturbing the peace!
  • Make sure that you place the targets in a location free from flammable material like dried grass, paper and so on
  • Never position the target within an object or at a location where shrapnel could get produced
  • Verify the legal aspect of using exploding targets. The laws governing their use may vary from one state to the other

You Are Now Ready To Go!

Exploding targets add a new and exciting dimension to target practice. If you use these in a responsible manner, you can have a fun time and hone your shooting skills at the same time. As you can see, we have shown you how to make your exploding targets which will cost you a fraction of the cost of commercially available ones.

If you are more resourceful and can procure the required equipment, you can even produce your powders. Even if you buy these powders and use them to make your exploding targets, you will still end up saving a whole load of money.

We hope you have enjoyed reading this article and that you will be able to make your exploding targets. Please add your comments, questions or feedback in the section below, and we’ll get back to you.

Filed Under: Gun, Shooting & Accessories 01:21 by Kevin Steffey

What Should Be Used To Screw On Broadheads

What Should Be Used To Screw On Broadheads

According to the Merriam-Webster dictionary, a broadhead is “a flat pointed steel arrowhead having sharp edges.” As an archer, you will be familiar with this term. Broadheads, however, are usually associated with arrow hunting of big game.

The question that is likely to come to your mind is, “what should be used to screw on broadheads?” As it is important to know the proper method of fixing a broadhead to an arrow, I have gone into detail on this subject.

Related: How Long Should My Arrows Be: Choosing Arrows of the Right Length – a Complete Explanation

Installing your Broadhead

A broadhead arrow

There are three known methods of installing a broadhead to an arrow spine, the tie-on method which early man used to tie broadheads with sinew or hide, the glue-on method and the screw-on method. Today the latter two techniques are used, and both approaches involve using glue which we will deal with in further detail later on.

There are three types of broadheads based on the kind of blade used, fixed, removable and mechanical (expandable). Broadheads have extremely sharp edges you may find it handy to use a broadhead wrench which you can easily buy online or from your local hunting store. However, a lot of people use their bare hands which works just as well, if you are careful while handling them. Sharpen your broadheads before each archery session.

The actual broadhead mounting process consists of three stages: preparation, gluing and aligning:

Preparation: Check the parts that need to be fixed thoroughly, the fit, finish, and if required you may need to roughen the surfaces that will be glued using emery paper or a file. You should remove traces of oil or residue by rubbing a few drops of alcohol or acetone. Now your broadhead is ready to be glued.

Gluing: There are two types of adhesives, hot glue, and cold glue. There is a bit of setup required if you are going to use hot glue, so ensure that your equipment is at hand. You should also ensure that you have adequate protection for your eyes and skin, whether you use cold or hot glue. You need to take proper safety precautions as a heat source is used for hot glue.

Aligning: Although this aspect of the broadhead mounting process tends to get sidetracked, it is a critical stage of the whole process. If you screw on broadheads crookedly, your arrows will not fly smoothly and in the predetermined direction.

Broadhead alignment can be done before, during and after gluing a broadhead. You should use a broadhead alignment system which you can purchase or make one at home. A home-made broadhead alignment system may not look all that cool but should work just as well.

As mentioned earlier, we shall now discuss the gluing process in more detail with particular reference to the type of glue that you are going to use. Both types of glue have their pros and cons as we shall see, so let us go into the finer details of these two categories of adhesives:

Hot Glue

Hot glue is a very popular choice for gluing broadheads or adapters to an arrow. These glues are convenient and cheap and have been used for decades. If a broadhead has to be removed later, it can be done by heating.

Ensure that you have the heat source (a spirit lamp or a propane torch), the glue and the alignment equipment at the ready. Now heat the glue just enough to melt some to liquid and place a few drops on the broadhead. Insert or screw the arrow to the broadhead and then warm the broadhead up enough to make the glue run uniformly between the two surfaces.

A word of caution: Be careful not to overheat the broadhead because that could ruin the temper of the steel which means that the steel loses its hardness.

While the glue is still warm, place the arrow in the broadhead alignment system, so that broadhead will be well-aligned to the broadhead as the glue sets.

Useful tip: You can also use a hot glue gun which I have found quite handy for other jobs as well.

Pros

  • Quick and easy to use
  • You can remove broadheads by heating them
  • You can align them after gluing, before the glue sets

Cons

  • Extra care required for setting up
  • Chances of getting burnt
  • Tempering of the broadhead steel may get affected by excessive heating

Cold Glue

bow hunting tips

Cold Glue is a relatively new concept in archery. A combination of cold glue and superglue is an attractive option today. The process of attaching broadheads to arrows with cold glue is essentially the same as that for hot glue but without the heating process.

As the glue sets instantly (if you use superglue), you need to be quick to align the broadhead before the glue sets. Cold glue is a preferred option for a ‘quick fix’ during competitions and tournaments. If you do not use superglue, then the glue needs some time to set. This process is known as ‘curing.’ The curing time would be mentioned on the packaging or in the instruction manual if the product came with one.

Pros

  • Instant fixing possible
  • Lesser equipment required
  • Totally safe as no heat is required
  • No danger to the temper of the broadhead

Cons

  • Difficult to align the broadhead if superglue is used
  • The glue can become brittle on curing
  • Broadheads cannot be removed once fixed

What have we learned?

It should now be clearer about what should be used to screw on broadheads. The procedure is quite simple when you know how.

  • Broadheads are screwed on an arrow using glue
  • There are two types of glue, hot glue, and cold glue
  • Each type of glue has its own set of pros and cons
  • Fixing a broadhead is not enough – you need to align it as well

We hope you enjoyed reading this article, and now have more clarity on what should be used to screw on broadheads. Please do contact us with any questions, feedback or suggestions that you have, and we will be glad to respond.

Filed Under: Uncategorized 00:49 by Kevin Steffey

  • « Previous Page
  • 1
  • …
  • 32
  • 33
  • 34
  • 35
  • 36
  • …
  • 49
  • Next Page »
  • AffioraTool Privacy Policy
  • AffioraTool
  • Best Shooting Rest Reviews For A Perfect Hunting – Best Shooting Rests Reviews
  • Hunting Safety: 5 Best Treestand Safety Harnesses Reviewed
  • How Fast Can A Deer Run – How Hard Would It Be To Catch A Frightened Deer On The Run
  • Rice Bran for Deer- How to Effectively Use Rice Bran to Attract a Deer?
  • The Best Reloading Scale for Consistent Accuracy
  • Which Shotgun Choke Is The Most Open?
  • 17hmr vs 22lr: Which one Should You Use?
  • 5 Top Coyote Hunting Dogs That Are Proven To Be Tremendous Hunters

DMCA.com Protection Status

Deerhuntingfield.com is a participant in the Amazon.com Services LLC Associates Program, an affiliate advertising program designed to provide a means for sites to earn advertising fees by advertising and linking to Amazon.com. Additionally, deerhuntingfield.com participates in various other affiliate programs, and we sometimes get a commission through purchases made through our links.