Deer Hunting Field

Hunting Blog

  • Hunting
    • Best Coon Hunting Lights
    • Best Treestand Safety Harness
    • Best Hunting Boots
    • Best Rubber Hunting Boots
    • Best Muck Boots For Hunting
    • Best Treestand Safety Harness
    • Best Hunting Spotlights
    • Best Elk Hunting Boots
  • Archery
    • Best Arrow Rest
    • Best Bow Sights
    • Best Single Pin Bow Sight
  • Gun, Shooting & Accessories
    • Best Bipod for Long Range Shooting
    • Best Scope For Ar 10
    • Best Shooting Rest
    • Best AR 15 Bipod
    • Best AR 15 Slings
    • Best ACOG Clone
    • Best Shot Timers
    • Best Rifle Bipods
    • Best Shooting Tripods
  • Survival
    • Survival Shelter
    • Finding and Purifying Water in the Wilderness
  • About Us

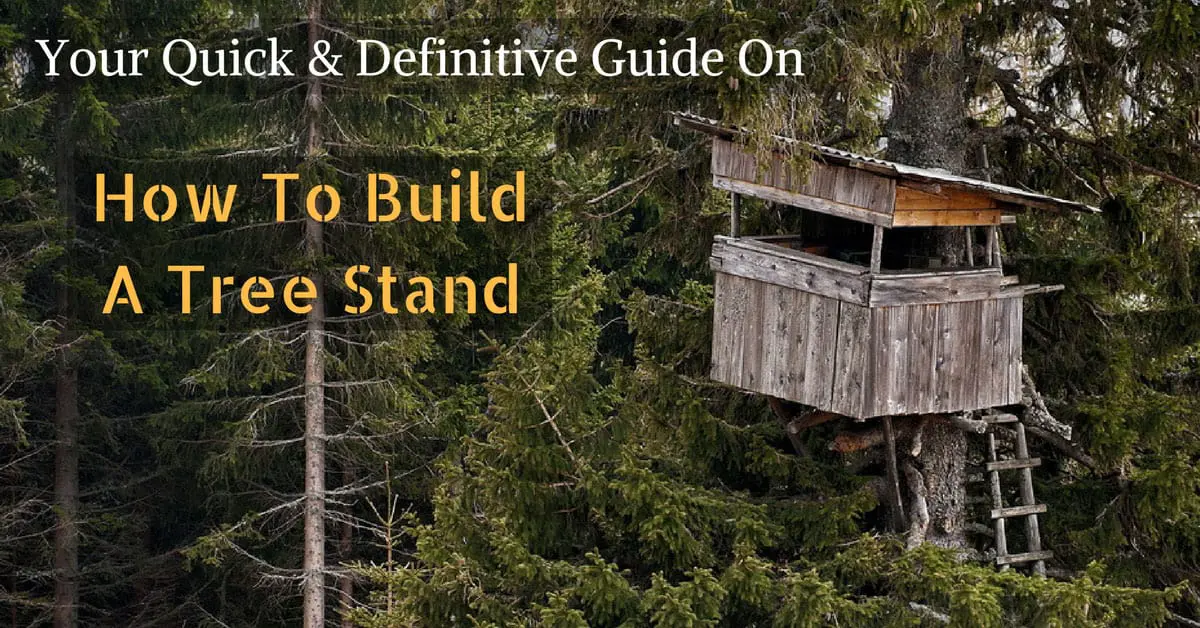
Your Quick & Definitive Guide On How To Build A Tree Stand

Your Quick & Definitive Guide On How To Build A Tree Stand

When it comes to hunting, having a secure and strategically well-placed tree stand gives you more chances of spotting a target. Tree stands are basically open or enclosed structures built to provide hunters a better vantage point.

Picture a camera tripod which also gives that support of elevation and better view for a photographer to capture great shots. A tree stand technically does the same for a hunters although it is attached to a tree.

Related: Get Rid of the Darkness: The 5 Best Hunting Spotlights

Tree stands are first commercially introduced back in 1970 and they are most commonly used in the Midwest and South to achieve the perfect kill shot.

Over the years, there had been modifications on how to build a tree stands and overtime, people have come up with other tree stand designs. Several of which are the climbing stands and hanging stands but the ladder stand is the most popular and basic type.

How To Build A Tree Stand-Building The Basic Ladder Tree Stand

1st Step: Building The Ladder

1. Place two 20-foot long (6 meters) beams lying down and side-by-side each other. Each beam should be 2 inches thick and 4 inches wide.

2. In making the rungs, cut 2-foot long (60.96 cm) pieces of beams. These should also be 2-by-4 beams and you will need 14 pieces.

3. Start placing each rung along the 20-foot long beams. Make sure that each rung is approximately 18 inches apart from each other vertically.

4. Nail or screw each of the rungs to the 20-foot long beams. Make sure that they are tightly fastened.

5. Lean the finished ladder against a tree. Using a rope of a chain, tie the top of the ladder around the tree.

Watch this to learn how to make a ladder tree stand.

2nd Step: Building The Seat

<p “”=””>1. Locate the perfect spot by looking for two sturdy branches, parallel to each on a large tree. <p “”=””>2. Nail two 2.5-foot long 2-by-4 beams on top of the branches. <p “”=””>3. Depending on the size of the hunter, nail or screw a piece of plywood on top of the 2-by-4 beams. <p “”=””>4. To support the seat, nail or screw two 2-by-4 beams diagonally from underneath the platform to the tree trunk.

You can check this video to see on how you can create a seat on your own.

3rd Step: Connecting the ladder to the seat

1. Nail the two 2.5-foot long pieces of 2-by-4 beams to the top of the ladder.

2. Screw these pieces from underneath the plywood platform. The top of the ladder should be flushed with the platform.

Once you’ve learned and mastered the skills on building the basic ladder tree stand, you can incorporate your own modifications and come up with a new design. You can create a structure that would best suit your needs and for you to have a great hunting experience.

Now that you have successfully accomplished building your own tree stand, you are well on your way to having a great hunt. And as a bonus, we also bring you some of the few things to consider while you are hunting.

Things To Consider For A Perfect Kill Tree

1. Location With Free Access

The location you have chosen must have a way to get in and out without spooking your target. You must consider sound and sight when looking for your perfect spot.

Being able to stand without making too much commotion such as crunching noises of dry leaves is a big plus. You must also be able to conceal yourself effectively during the hunt.

Location With Free Access

2.Safety Is A Priority

Apart from building a sturdy tree stand, you must also keep in mind to use a harness or any other safety mechanism to your design. One out of three hunters suffer from a fall during hunting from a tree stand as recent statistics have revealed.

Related:  Hunting Safety: Picking the Best Treestand Safety Harness

And since hunters choose great heights to have a better view, falling from these heights can possibly cause death. Always make sure that you attach your harness properly before climbing to your tree stand.

Apart from that, wearing the perfect footwear for climbing is also a must. Invest on a footwear with great traction. This is extremely important so you can avoid slipping and falling during climbing or descending from your tree stand.

Another safety tip is to never allow yourself to fall asleep while on your tree stand. It is a fact that during hunting, you will be spending hours perched on your tree stand and exhaustion may kick in at anytime.

Even if you’re secured by a safety harness, falling asleep while on your tree stand could still be dangerous. Since it is advisable to be with a hunting partner, having a person ensures you of a help anytime, especially that one who can keep you awake.

Related: How To Use A Climbing Tree Stand – How to Gain a Huge Advantage with a Climbing Tree Stand

3. Stay Close To The Game Trail

One of the most important things to consider is the location. This will not only give you the perfect view but also increase your chances for spotting more targets.

To maximise your potential for a successful hunt, make sure that the location of your tree stand is close by a number of game trails.

Determine the perfect spot by monitoring the tracks and signs of the trail to know how often it is used for the hunt. A great location would also provide you of at least a view of 180 degrees.

In this way you can see the whole game from afar and be able to prepare for the kill.

Final thoughts

Building a tree stand may be a simple task to complete but you also must take in a lot of things into consideration.

Your skill for building a sturdy structure, your ability to determine a perfect location and having a strategic plan in place will get you a higher chance of having a great hunting experience.

We hope that we shared with you more than enough information to get you going on building your own tree stand.

If you feel that we have given you useful tips or you want to add more to what we have just discussed, let us know by putting in in our comment section. Until then, have fun in building your tree stand!

Filed Under: Hunting 04:01 by Kevin Steffey

Why is Good Marksmanship Important: The Fundamentals of Good Marksmanship and why it is so important

Why is Good Marksmanship Important: The Fundamentals of Good Marksmanship and why it is so important

Whether you use a rifle for target practice or hunting, you may ask this question: “Why is good marksmanship important?” This issue is a rhetorical one because obviously, anyone who holds a rifle would shoot well if they were an excellent marksman. The central issue therefore is, how does one become a good shooter? What are the qualities that make an expert shooter?

Related:How To Use A Rifle Scope For Perfect Accuracy

I feel that the answers to these questions are the key to becoming a good shooter. Follow these 11 points, and you will see what a difference it makes to your shooting skills! Each of the following is a building block of good marksmanship:

1.Proper Sight Adjustment

Also known as “sighting in a rifle” or sight alignment, you need to follow these three steps:

Boresighting: Take your unloaded rifle and remove the bolt. Fix the gun on a secure resting point and looking through the bore, align the target with the bore. Now adjust your sight so that the target appears in the center of the crosshairs of the sight.

Paper Alignment: Place a paper target at 25 yards and shoot once. Depending on how much off-target your shots are, adjust the scope until you get a fairly accurate shot at 25 yards.

Fine Tuning: Now, repeat the same steps at 100 yards. Your rifle is now ready for use.

This procedure results in the development of a “sight picture” for your weapon, which in simple terms means superimposing your sights on the target.

2.Shotgun Patterning

This procedure involves shooting a paper target and recording the deviation which defines the pattern a shotgun makes. A good distance for patterning your shotgun is about 40 yards.

3.Selecting an Appropriate Shotgun Choke

Several factors govern the selection of a suitable shotgun choke like range, type of target, shooting preferences and so on. The logic here is that the tighter the choke, the closer the pattern between individual pellets will be on the target.

It goes to follow that you will need a wider choke for small and fast targets. Thus, an improved cylinder choke or modified choke would give you the most advantage in this case, especially for shooting small, fast and close birds.

Selecting an Appropriate Shotgun Choke

4.Proper Shooting Technique

There are countless tutorials on how to adopt a proper shooting technique. In a nutshell, you need to aim for the following best practices:

  • Shooting Arm: Keep your shooting arm extended and relaxed
  • Leg Stance: Maintain a stable foot position, preferably with your legs apart about shoulder width.
  • Body Position: Lean your body slightly forward while keeping proper balance
  • Maintain Proper Balance: Balance your body in such a way as to counteract the recoil
  • Firm Grip: Maintain a firm, even and tight grip on the weapon
  • Trigger Control:How you pull your trigger is very critical to the accuracy of your shot and can be an issue with even experienced shooters.

Follow these simple steps while pulling the trigger and you can’t go wrong:

  • Once you have the target in your sights and you are ready to shoot, hold the weapon rock-steady in your hands
  • Hold your breath for a steady shot.
  • Position your finger on the trigger
  • Start pressing the trigger towards yourself
  • Once you start pulling the trigger, the only thing moving should be your finger and the trigger
  • Avoid any jerky movement – the pressure you apply on the trigger should be a “squeezing” action.
  • On firing the shot, do not flinch

5.Develop your Posting Skills

No, this is not about blog posting – we all do enough of that on a daily basis at home! When you wait for game while sitting or standing in one spot, this hunting strategy is called posting.

6.Breathing

Proper Breathing is very beneficial while shooting. You’re ready to take a shot. You should draw a deep breath and then exhale half of the air from your lungs. This technique is tried and tested and secures maximum stability to your rifle at the instant of firing it.

7.Safety of the Shot

Once you have a target in sight, make sure that you are guaranteed to hit it.

8.Shooting Positions

There are four basic configurations for shooting:

  • Kneeling
  • Standing
  • Sitting
  • Prone

You would do well to practice shooting in all these stances, as this will contribute significantly towards making yourself into an expert marksman.

9. Light

The light factor is not discussed much but is, however, a critical one. You need to be sure that the light is sufficient for you to view your target efficiently. If you are wearing sunglasses, remove them well before your actual shooting.

10. Safety First

Be aware of the safety measures that you need to take while handling firearms. Follow the four rules of gun safety:

  • Always consider a gun loaded
  • Only point your gun at what you are going to shoot
  • Be sure of you target as well as what is behind it
  • Don’t touch the trigger until you have a target in sight

11. Practice

pratise

Practice makes perfect, so they say, and it couldn’t be truer in the case of aspiring to become an excellent marksman. The more time you spend with your firearm on the range or out hunting, the more familiar you will get with your weapon, and you will see a steady improvement in your shooting skills with the passage of time.

Conclusion

These are simple, actionable steps that you can help you in becoming an excellent marksman. Just incorporate these steps into your regular shooting routine, and you will see a marked difference in the way you shoot. To sum it all up, ensure that you follow these basic steps:

  • Get familiar with your weapon and optimize it
  • Follow the procedures for good marksmanship
  • Make good use of accessories wherever required
  • Keep practicing on a regular basis
  • Follow safety procedures

We hope that you get some benefit from reading this article and we look forward to your feedback and comments. We will respond to any questions that you may have. Happy shooting!

Filed Under: Gun, Shooting & Accessories 22:27 by Kevin Steffey

Get That Pelt! How to Skin a Coyote

Get That Pelt! How to Skin a Coyote

When it comes to predator hunting, a lot of us have one thing on our minds: the skin. While most hunters will find themselves skinning and saving hides, there’s few trophies held in higher esteem than the pelts of predatory mammals. 

Learning how to skin coyote and preserve the hide is as much of an art as learning to hunt the canines ourselves, and making sure that you do it properly is one of the most fulfilling experiences a hunter can have.

Related:How To Bleach A Deer Skull-No Waste: 5 Simple Steps to a Beautiful Skull Trophy

How to Skin a Coyote

1.) Act Quickly

Get That Pelt! How to Skin a Coyote

If you’re planning on stripping the hide off a coyote, the best time to do it is right after you’ve made the kill. The membrane between the skin and muscle is much easier to break while the body is still warm and it’ll make the whole process a lot easier on you.

This means that you want to be prepared when you go out. If you’re hunting from a stand, for instance, you want to have an area nearby where you can skin the animal. This generally means either a low hanging tree branch or a sturdy fence post to tie off on.

These instructions are for taking the pelt quickly, not for taxidermy and mounting purposes which is a specialized art in and of itself, so keep that in mind. You can also drag them back to your vehicle and then move them back for freezing, but a coyote that’s still warm makes the task a lot easier.

FURTHER READING➜ Learn About When Coyotes Are Most Active And More!➜ The Important Things to Know in Understanding Why Coyotes Howl➜ How to Attract Coyote: Predator Hunt Like a Pro

For selling hides, the feet are basically useless. Instead of bothering with them, many hunters will cut the front and back legs off below the knee to make things easier.

Make sure to do this on a hard surface with a sharp tool in order to get a clean and quick cut. A log is usually your best bet, but most people will be able to find something in the field which they can work with.

If you don’t have a hatchet or a heavy machete then you can still proceed. Taking a sharp knife ring the limbs, being careful not to cut into the meat or tendon beneath the hide as that will complicate matters considerably and risks getting a lot of blood on your pelt.

Either way, you’re going to want to use paracord or something similar to hang the carcass now and get to the actual skinning.

3.) Skinning the Legs

At this point it’s time to get cutting so you can remove the majority of the skin from the animal. You’ll make a cut along both legs and pass over the anus first. Depending on your preferred method you might want to rip the connective tissue out with your hands or probe ahead with your knife to cut it.

You should definitely be wearing gloves at this point, and be careful not to cut yourself. As scavengers coyote can carry some pretty nasty diseases and you do not want to make blood-to-blood contact with the animal.

After you’ve made the cut you’ll want to remove the skin down to the tail.

4.) Removing the Tail

Removing the tail isn’t quite as tricky as many people seem to think it is, but you’ll need some specialized tools in order to pull it off.

Before you get much further you’re going to also need to finish cutting around the anus of the animal in order to make things easier.

The oldest method is to grab it between two pieces of metal rod after making an incision and removing the first couple of inches of fur. One person holds the rod and the other will yank out the tail bone out.

You can also do it by hand, but it’ll require a whole lot more effort than a lot of people are willing to put into it.

There are also specialty tools which can be used to remove the fur from the tail by a single person. For the most part, these will clinch up and allow you to yank the tail bone while you’re holding it shut.

Either way it’ll require a bit of grunt work, but once it’s done you’ll be able to keep the tail with the pelt which makes for a much better finished product. Remember to cut all the way along the tile in order to preserve it better during the final steps.

.) Removing the Rest of the Hide

5.) Removing the Rest of the Hide

From here you’ll simply need to separate the rest of the skin from the torso. If you’ve already prepped the lower limbs it’s a fairly simple process, mostly involving yanking the skin downwards as you go until you hit the limits of the connective tissue then separating it again.

Some people, once again, will use a knife while others will just work their hands in. This will compromise the bulk of your time during the skinning process for the most part, but it’s a simple process and most hunters will pick it up in no time.

Then shoulder blades/arm pit area often prove to be quite problematic for people who aren’t used to skinning canines but there’s a neat little trick you can utilize to make the whole process smoother.

Once you get the hide pulled over this area a little bit you can take a wooden rod or a screwdriver and pass it between the arm and the still-attached hide. Push downwards on it and you’ll find it comes off easily enough.

Depending on how you prepared the forearm you may need to cut it some more to get the hide down around the neck, but you’re almost there!

6.) Removing the Facial Fur

It’ll totally ruin the effect of the hide if you were to decapitate the animal at this point, and if you’re selling them you’ll also want to make sure you remove the face for the maximum value to be gained from the fur.

There’s a large amount of membrane connecting the face to the fur and at this point a razor sharp knife and patience are your friend.

Once you’ve pulled the fur down to the ears you’ll see a couple of bumps. This is the underlying cartridge of the ear and you’ll want to cut through it as close to the top of the fur as possible without damaging it.

The eyes can be found by probing with your fingers, and then you’ll make a cut over them in order to free up the skin. Done properly you’ll even be able to get the lashes, but don’t kick yourself if it takes a few coyote to get the process down.

Cut across the very back of the jaw once you have the hide pulled down far enough. You’ll probably need to probe with your fingers again in order to find the right spot. You can remove the upper lip by bringing your knife along the top of the jaw carefully, following the bone on the upper portion of the jaw.

Remember to only cut in while you’re doing this, rather than downwards. Cutting downwards will damage the hide which isn’t what we’re going for.

The lower lip has pretty much no value, and most hunters will simply remove it. Cut inwards just a bit below where the teeth are showing then come back up and leave the lower lip attached to the carcass for the easiest method to get it out of the way.

Afterwards, simply cut and pull along until you’ve reached the nose cartilage and you can quickly cut the cartilage out which will leave the nose intact on the fur. By preserving the facial features you’re also preserving the most valuable parts of the hide

You’ll also have successfully removed the fur at this point. Don’t be surprised if it takes quite a while the first couple of times.

Now the hide just needs to be cooled down, after which you’ll either need to freeze it or begin the fleshing process immediately.

FURTHER READING➜ What Does Coyote Poop Look Like: How To Identify Scat➜ 5 Top Coyote Hunting Dogs That Are Proven To Be Tremendous Hunters➜ 5 Of The Absolute Best Coyote Baits

Conclusion

Taking fur bearing predators is one of the most rewarding activities possible for many hunters. Coyote are particularly tricky prey, both in life and death, and require some special attention. Once you’ve learned how to skin a coyote, however, you’re sure to have some impressive trophies to hang even if you opt to keep them, and if you’re good at it then you can make back most of the money spent on your trip.

Filed Under: Coyote Hunting 20:10 by Kevin Steffey

  • « Previous Page
  • 1
  • …
  • 30
  • 31
  • 32
  • 33
  • 34
  • …
  • 49
  • Next Page »
  • AffioraTool Privacy Policy
  • AffioraTool
  • Best Shooting Rest Reviews For A Perfect Hunting – Best Shooting Rests Reviews
  • Hunting Safety: 5 Best Treestand Safety Harnesses Reviewed
  • How Fast Can A Deer Run – How Hard Would It Be To Catch A Frightened Deer On The Run
  • Rice Bran for Deer- How to Effectively Use Rice Bran to Attract a Deer?
  • The Best Reloading Scale for Consistent Accuracy
  • Which Shotgun Choke Is The Most Open?
  • 17hmr vs 22lr: Which one Should You Use?
  • 5 Top Coyote Hunting Dogs That Are Proven To Be Tremendous Hunters

DMCA.com Protection Status

Deerhuntingfield.com is a participant in the Amazon.com Services LLC Associates Program, an affiliate advertising program designed to provide a means for sites to earn advertising fees by advertising and linking to Amazon.com. Additionally, deerhuntingfield.com participates in various other affiliate programs, and we sometimes get a commission through purchases made through our links.