Deer Hunting Field

Hunting Blog

  • Hunting
    • Best Coon Hunting Lights
    • Best Treestand Safety Harness
    • Best Hunting Boots
    • Best Rubber Hunting Boots
    • Best Muck Boots For Hunting
    • Best Treestand Safety Harness
    • Best Hunting Spotlights
    • Best Elk Hunting Boots
  • Archery
    • Best Arrow Rest
    • Best Bow Sights
    • Best Single Pin Bow Sight
  • Gun, Shooting & Accessories
    • Best Bipod for Long Range Shooting
    • Best Scope For Ar 10
    • Best Shooting Rest
    • Best AR 15 Bipod
    • Best AR 15 Slings
    • Best ACOG Clone
    • Best Shot Timers
    • Best Rifle Bipods
    • Best Shooting Tripods
  • Survival
    • Survival Shelter
    • Finding and Purifying Water in the Wilderness
  • About Us

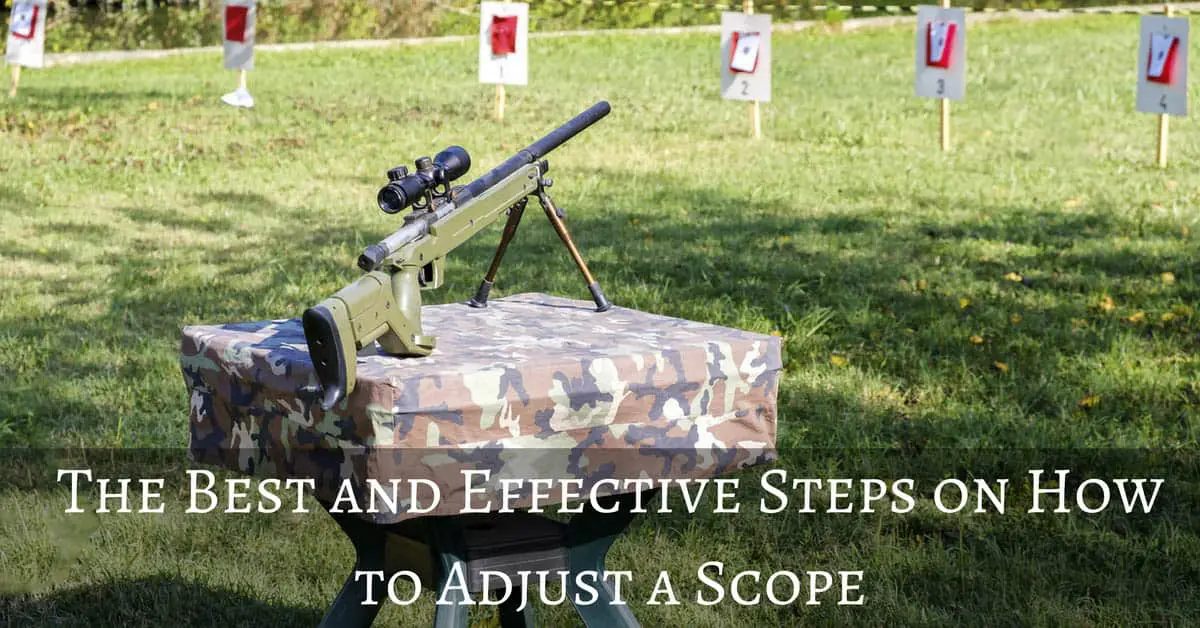
The Best and Effective Steps on How to Adjust a Scope

The Best and Effective Steps on How to Adjust a Scope

So you have bought yourself the world’s most high-end and expensive firearms. However, you will never know your rifle’s potential if it is not paired with a top-end scope or any optical devices which will allow you to maximize your usage and test the potential of your rifles. It is also important that you are knowledgeable as to how to adjust a scope.

This article is aimed to those who are seeking for information on how to adjust a scope. Here, we will provide the basic knowledge that you need to know to be able to learn the importance of having a proper zero when ​shooting and targeting.

More…

Quick NavigationUnderstanding The Big Three Rifle Scope Adjustments And What These Turrets Do1. Windage2. Elevation3. ParallaxSteps on How to Adjust a Scope1. The Proper Ways Of Scope Installation2. Setting the Zero3. After Evaluation Of The Hits And Misses, Adjust The Scope As NeededConslusion

Understanding The Big Three Rifle Scope Adjustments And What These Turrets Do

Adjusting your scope or optic is the process of carefully aiming your weapon in the most stable position possible. It attempts to place the crosshair where the gun is shooting rounds. This process includes using both turrets to carefully move the crosshair up, down, left and right.

There are three most common rifle scope adjustments that are very attractive with almost all shooters, professional or not. It is best to have these scope turrets explained as it will give you a better view and understanding of your rifle scopes and rifle scope adjustment knobs. The three common turrets are as follows:

Before proceeding, you can check on the following video for visuals and more ideas:

1. Windage

Windage is commonly understood in MOA or Minute of Angle and is expressed in inches. By turning the scope of a turret, you will be able to make adjustment increments. Here, one click represents a minute of angle which can be translated to a change of about an inch at 100 yards. Windage is your left and right adjustments taking into consideration as to how the wind blows.

As a general principle, you should be mindful that changing the elevation of the sight setting by one minute of angle also modify the bullet’s impact point by one inch at 100 yards. Also, not all scopes are calibrated for MOA or precise to the inch. Thus, the theory behind MOA and the way your scope incorporates this method compared to other scopes will greatly vary. It is best to remember that you can only gauge what a click means until you have personally tested it or have seen it in action.

2. Elevation

Elevation turrets and Windage turrets work on the same principle. The only difference is that adjustments in elevation turrets move the up and down impact points of your rounds and it can be made in the field for extremely far and long range shots.

Your bullet starts to drop when shooting past certain ranges which require for the scope to be zeroed for certain distances to be able to compensate for the bullet drop entirely.

3.Parallax

Although most of the manufacturers nowadays are already setting the parallax at the factory and may not require the shooter to make some adjustments, it is still best to include this in the discussion as it will help the shooter to gain a full understanding of his rifles.

Target Practice

So, to fully understand parallax, it is how the target moves away from the reticle as you move your head. Meaning, when you look through the scope, and you move your eye just a little bit to the left and right, your crosshairs seem to get off-target just a little bit in the opposite direction.

In your zeroing, if the parallax is out of adjustment, zeroing at a range is possible, but you will not be able to hit your point of aim. Since this can obviously affect your point of aim, adjusting the parallax especially at extreme ranges would be very helpful to have a precise and accurate shot even at long distances.(if you want to learn about  shooting tripod click here)

So, here are the easiest ways to adjust the parallax settings:

  • As you sight down the scope, ensure that the reticle is right on the target and showing you a clear and crisp image.
  • Slightly and slowly adjust the parallax turret while moving your head and eyes up and down to monitor and achieve the desired settings.
  • You can continue doing step number two (#2) until you no longer see any movement in the reticle and your target.

Steps on How to Adjust a Scope

1.The Proper Ways Of Scope Installation

a) Ensure that base and rings are mounted securely onto the scope

Superior base and rings should be use ensuring proper holding of the scope for years and to prevent you from adjusting from time to time. So, installing the mount requires you to tighten your screws putting the instructions provided in the user’s manual into consideration.

b)The scope should then be mounted on the firearm

Following the manufacturer’s directions, the scope should be laid into the brace with the eyepiece leaning in the accurate direction. A small spirit level must be used and lay it on top of the scope to scrutinize for level and use it to tighten up the rings.

c)Correct positioning of the eyepiece

Established the distance by using the eye which you are comfortable targeting with to make sure that you have the correct position when shooting. Make sure to have a definite and unblemished image provided by the eyepiece.

d)Cross-hair should always be leveled

First, ensure that the rifle is in a constant position. It should be fixed to a base where the gun stock is equally leveled to the ground. Then, rotate the cross-hair should be rotated to allow the vertical to be properly aligned and oriented. .

e)Tightened your base firmly

While ensuring that the cross-hair is still on the proper alignment, steadily constrict your rings. Then, tense each screw while making sure that cross-hair has not moved.

Weapon On Gun Range

2.Setting the Zero

a)Range-test your rifle scope

For a gun scope to accurately sight-in, test it at the gun field for you to measure the distance and the range.

b)Use a rest to mount the gun

Mount your rifle into a stand to provide yourself an accurate zero. If you cannot find a compact firearm stand, find an even spot for targeting and shooting. You can use a pile of books, boots or jackets to help you get a regular position.

c)To create a momentum, shot three times to five times

Training the sight on the bulls-eye upon looking through the scope, make sure that the shooting field is already hot. Use an appropriate stock to check weld and to maintain similar sight picture.

Then, ensure that the rifle’s safety catch is on the off position then squeeze the trigger firmly after the end of your exhale to achieve the most precise shot. Perform the same process three to five times to create a momentum.

d)Scrutinize your shot and review your hits and misses

Discharge your gun and recover your target board to review it and for you to have an exact representation of your rounds.

e)Knob adjustments, then recheck

Through your knobs located at the top and on the side of the optic, you can now make changes. Follow the steps below for clear and concise instructions.

  • Once the adjustments are made, fire a few more sequences, evaluate the groupings then readjust.
  • Do not forget to identify the bullet holes in the target or use a different target for you not to get confused.

f) Little adjustments one at a time

Since you are still making adjustments, it is recommended that you start with small number of yards then increase it slowly. Once you are already confident with your adjustments, you can increase it again. One thing that you need to remember is that you can opt to move to ambitious numbers such 250 or more yard range if your scope still allows you. However, keep in mind that in ranges like these, the wind is already a big factor to consider.

Sniper Rifle

3.After Evaluation Of The Hits And Misses, Adjust The Scope As Needed

a)Know your adjustment knobs and their uses

Scopes usually have two dials; the top dial and the side dial. These knobs allows you to make adjustments in the scope and to set the scope to zero. This allows you to align your vision to where the rifle is pointed. To change the up and down and left to right capabilities of the cross-hairs the knobs should be used.

b)Learn your misses and adjust towards it

Keep making the essential modifications until you are confident that your rifle is already safe and stable and is regularly hitting the bulls-eye. You can move elsewhere when you want to try from a different range.

c)Befriend the bore sight

If a boresight is accessible to you, it will help you save more ammo and avoid hassle. If you still do not have this feature, you can bring your rifle to a gunsmith and have them bore sight your rifle.

Conslusion

Above are the simplest and most guided steps for you to adjust your scope and help you achieve the shooting experience which you desire. This article aims to fulfill all your needs and guides as you experience the exciting world of shooting and hunting. So, leave your comment and let us know what you think. We would also appreciate your suggestions

Filed Under: Gun, Shooting & Accessories 17:03 by Isaac Chase

Difference Between Mule Deer And White Tailed Deer

Difference Between Mule Deer And White Tailed Deer

Confusing a whitetail with a mule deer is a common wrong identification many hunters make. They have a similar look, but these species also bear many distinct differences. A mule deer vs whitetail comparison will help you hone your hunting skills.

Humans have been chasing these deer for several thousand years. Be it a mule or white-tailed deer, they all offer a unique and exciting adventure that hunters cherish.

Some hunt both, but others prefer to go after just one of them. In either case, you should educate yourself about these animals, so you don’t get confused in the field.

Please check: https://deerhuntingfield.com for more information

Mule Deer Vs Whitetail

Body Size

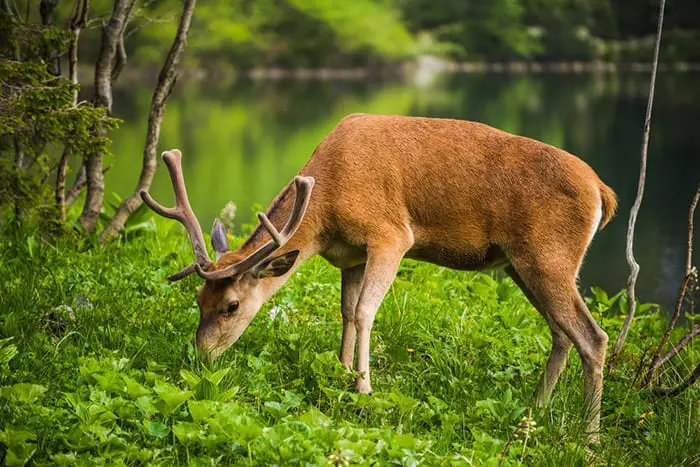
What does a mule deer look like? Mule deer typically have a little bigger and heavier body, even though you may have a hard time seeing this difference between whitetail and mule deer in the field.

Mule Deer

Mule Deer

The average mule deer weight in Colorado is over 250 pounds, while an Illinois whitetail buck weighs just around 200 pounds.

Nutrition, age, and environmental factors all have an impact on the mule deer vs whitetail size. And the actual size of a specific deer also varies across their range.

For example, white-tailed deer follow Bergmann’s rule, meaning their average size gets bigger in the North. It is normal to encounter Saskatchewan bucks that weigh around three hundred pounds, while small-bodied deer are a common sight in southern Texas.

This relationship between body size and latitude doesn’t apply much to mule deer.

Color Patterns

It’s as obvious as blacktail deer vs whitetail deer, but mature white-tailed and mule deer feature slightly different changes in patterns throughout the year.

A reddish-brown is the common color they have in the summer. But when the winter comes, there is a clear contrast. While mule deer typically run a more grey color, whitetails often have a tannish body.

Antlers

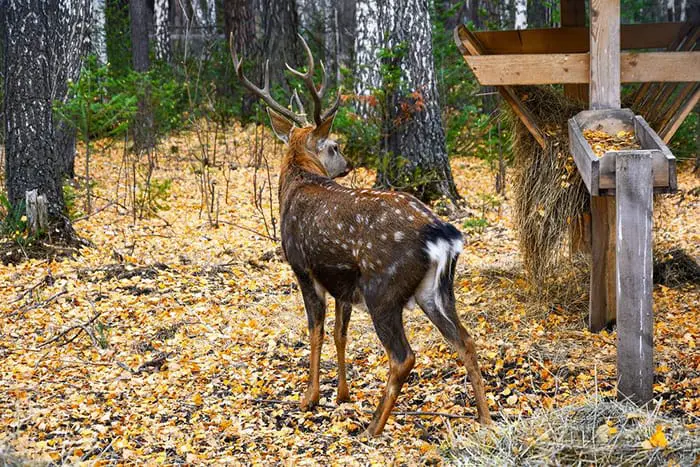
The antlers of whitetails are generally smaller than those of mule deer. The best explanation for this mule deer vs whitetail deer antlers is that to mule deer, antlers are their primary sexual ornaments, just like manes in male lions or jaws in male salmons.

The evolution happened in a more open country when it comes to mule deer compared to whitetail. Natural selection plays the biggest role in this and provides mule deer with big antlers so they can attract females from a far distance.

On the other hand, forests and marshes are where whitetails have evolved. These terrains have limited visibility, rendering larger antlers and their long-range attraction less necessary.

In addition to the size, the structure of antlers also sees big differences.

On white-tailed deer, single tines fork from the main beam. A typical mature buck has around 4 or 5 points on each side, including the brow tine or “eye guard”.

Mule deer antlers have a more bifurcated configuration. Their tines sprout above the beam. Most mature individuals feature four points in two forks, including two brow tines on the side.

Antlers of whitetails

Antlers of whitetails

Keep in mind that these are general descriptions. The actual structure can vary massively between individuals of each species. Many states also outlaw hunting for whitetail and mule deer spikes.

For instance, not all mule deer have forks. Some may have short brow tines, and a few of them even have none. Be cautious when deciding which species you’re seeing.

Face

White-tailed deer have less white on their faces. White tail deer faces also feature a slightly brighter forehead than mule deer as well.

Ears

There is a reason mule deer have such a name. It comes from the fact that they have relatively large ears that resemble those of mules. 

Whitetails also have large ears, but not as big as those of mule deer.

Perhaps it comes from the evolution of mule deer. It gives them such a trait, which has a better heat dissipation. In hot environments, mule deer ears can cool themselves better.

For this exact reason, many mule deer living in a colder climate have a big part of their ears frozen and missing because of frostbite.

These big ears also give mule deer a tool to detect predators in their open habitats. Many hunters have experienced this first-hand. On a calm day, the slightest movement can be noticed by mule deers several yards away.

Rumps

The rumps of most white-tailed deer have a dark, brown color.

Mule deer usually have a big white patch on their rumps, which is different from the rest of their body. This makes it easier to spot mule deer from a distance when hunting.

How to attract deer

Every hunter should master methods for attracting deer.

Heads

The face of mule deer is usually white from the eyes to the nose. White-tailed deer, on the other hand, have white rings around their nose and eyes, while their faces are mostly brown.

There is a white patch on the throats of both these species. But the larger ears of mule deer are usually set at an angle of around 30 degrees, while whitetails have round and standing erect ears.

Again, remember that between different individuals, there may be a color variation.

Does

The female individuals of mule deer typically come in anywhere between 100 and 200 pounds, while whitetail does weigh in around 90-200lbs.

Female whitetails give birth more often, often breeding for the first time at six months old. A mule deer doe needs a longer time to mature.

The gestation periods of mule deer and whitetails are around 7 and 6.5 months, respectively.

Mule deer breed in the latter half of November. Whitetails mate from late November to early December.

Fawns

These deer species have a lot in common in this department. Most first-year does have one fawn each year in May or June. Older does can deliver twins or triplets.

Most newborn fawns weigh around 6 pounds and have white spots on reddish skin. This color scheme has a camouflage purpose. They can stand within a few hours if their mothers nurse them immediately.

When fawns are still too weak to follow their mothers, the does often leave them alone and go off to feed. They often meet at mealtimes during the first few weeks.

Young fawns start to lose their white spots before the second month. It isn’t easy to tell whitetails and mule deer apart in the first month. They typically stay with their mothers for the first year.

Tails

Tails are one of the biggest clues to distinguish these species. Only the underside of white-tailed deer’s tails is white, which can be seen only when they hold their tail afloat.

Whitetails do this a lot when they want to send signals to other deer. Whitetails get their name from this part of their tails. The image of these tails held high is one of the most iconic parts of hunting whitetails.

Meanwhile, there is a wide range of bright colors on the tails of mule deer. They are smaller and usually come with a black tip at the end.

The tails of whitetails have a white underside

The tails of whitetails have a white underside

Behaviors

A mule deer typically lives in a wider home range. Most whitetails can stay within a small area (about a few square miles) around their birthplaces. The natural habitat of lowland whitetails has plenty of food resources, so there is no need for them to travel too far from their home to survive.

For mule deer, the story is different. They often spend their summer in high alpine terrain, where food sources are plentiful.

But snow levels become unmanageable when the winter comes. And mule deer are forced to move downhill to lower sagebrush and river valleys habitat.

These places provide them with more accessible food. The distance between them can go up to a hundred miles. As a result, mule deer can migrate farther than most land animals.

Unlike elk, which are grazers, whitetails and mule deer are primarily browsers. They can eat a slew of different plants. Their preferred foods are shrubs and forbs instead of grass.

That said, mule deer and whitetails also seek green grass in the spring. During the fall and winter, mule deer mostly eat sagebrush, aspen shoots, and mountain mahogany. Young saplings, acorns, food plots, and waste grain are favorites of whitetails during this period.

Dawn and dusk are when these big game animals travel and feed most actively. Whitetails and mule deer tend to rest and chew their cuds in the meantime.

In the hunting seasons, mule deer prefer shady spots near ridges, while whitetails often choose thick bedding areas to scan for danger.

These species breed or rut mostly in November. It is rare, and the offspring often don’t survive to adulthood, but hybridization between them does happen.

The rut of whitetails hits its peak during the first half of November. This period for mule deer happens in the third and fourth weeks.

During the rut, white-tailed deer are also on the move, but they don’t travel as much as mule deer. That isn’t necessary as their home range often has a high density of options to pick from.

Mule deer don’t have that benefit. They don’t have much of a choice when the densities of productive areas are lower. These bucks have to cover much more ground to find does. Their nomadic nature is also a big part of this when the winter migration is often coincident with their rut.

Both these deer species own amazing sensory capabilities in terms of hunter and predator avoidance. Their good eyesight helps them pick up movement from a long distance. They also utilize their strong sense of smell to reduce the chance of being shot at or eaten.

When their ears and eyes haven’t sensed anything dangerous yet, they can also rely on their noses.

The big ears of mule deer are also a massive advantage of theirs. But they tend to take a longer time to verify if something is actually a threat. Mule deer live in open country, and waiting for a confirmation prevents valuable energy from being wasted on long unnecessary runs.

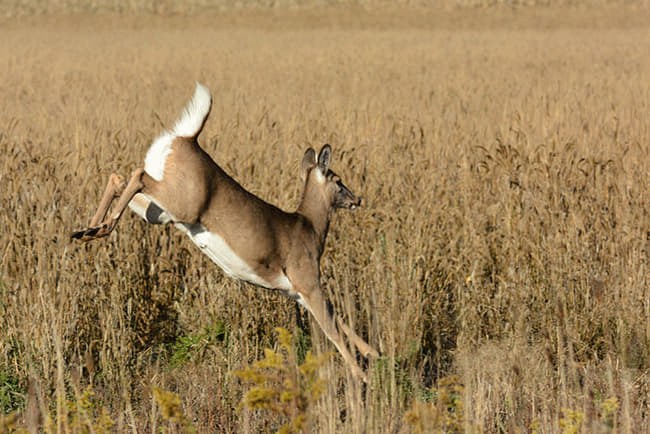
Mule deer and whitetails run in very different ways. Whitetails tend to run fast immediately with bounding leaps when they need to escape predators. Mule deer gallop or trot more slowly at first before proceeding to slot when alarmed.

Whitetail deer doe running

Whitetail deer doe running

Slotting is a unique ability of gazelles like mule deer when they lift all their body in the air with high bounds and stiff legs. Also known as pronging, this skill allows them to jump farther at downhill or uphill angles. Mule deer can also change direction in uneven terrain easier while slotting.

Spooked mule deer have a habit of stopping and checking for further running. It is very rare for hunters to see whitetails do this as they tend to spring fast to cover themselves.

Hunting

Most hunters see whitetails as the more paranoid species under pressure. This trait comes from thousands of evolutionary years, making them more experienced in avoiding predators.

Because of this, most hunters use ambush tactics to kill whitetails. It can be the best method as in the South, Northeast, and Midwest, food sources in the open look appealing to whitetails.

Hunting mule deer in the west may need different tactics. Spot and stalk is the most popular method. Learn where to shoot a deer to hunt them in the most ethical way. If you want to improve the accuracy of your shots, look at the best AR 15 bipods.

Frequently Asked QuestionsAre mule deer bigger than whitetail?

Generally speaking, mule deer tend to be bigger than white-tailed deer.

Do mule deer eat snow?

No. They typically move down out of the mountains when their food is covered by snow. 

How Big Can A Mule Deer Get?

Mule deer can range up to 7 feet long and 3.5 feet high, with a weight of up to 280 pounds. Female individuals are smaller than mule deer bucks.

Does Mule Deer Vs Whitetail Taste Better?

This mule deer vs whitetail taste is a matter of preference. Most people prefer whitetail, the reason they’re more sought after. But many also think mule deer taste as good as them. 

Conclusion

From tails to behaviors, there are many differences between mule and white-tailed deer, two of many species in North America.

In addition to the look, there are also a ton of differences in how these big game animals behave. When you’re hunting in overlapping areas where they may coexist, a good understanding of whitetail vs mule deer is a must.

[tcb-script type=”application/ld+json”]{ “@context”: “https://schema.org”, “@type”: “FAQPage”, “mainEntity”: [{ “@type”: “Question”, “name”: “Are mule deer bigger than whitetail?”, “acceptedAnswer”: { “@type”: “Answer”, “text”: “Generally speaking, mule deer tend to be bigger than white-tailed deer.” } },{ “@type”: “Question”, “name”: “Do mule deer eat snow?”, “acceptedAnswer”: { “@type”: “Answer”, “text”: “No. They typically move down out of the mountains when their food is covered by snow.” } },{ “@type”: “Question”, “name”: “How Big Can A Mule Deer Get?”, “acceptedAnswer”: { “@type”: “Answer”, “text”: “Mule deer can range up to 7 feet long and 3.5 feet high, with a weight of up to 280 pounds. Female individuals are smaller than mule deer bucks.” } },{ “@type”: “Question”, “name”: “Does Mule Deer Vs Whitetail Taste Better?”, “acceptedAnswer”: { “@type”: “Answer”, “text”: “This mule deer vs whitetail taste is a matter of preference. Most people prefer whitetail, the reason they’re more sought after. But many also think mule deer taste as good as them.” } }]}[/tcb-script]

Filed Under: Deer Hunting 20:00 by Kevin Steffey

The Best Deer Feeders (It’s Time To Attract More Deer!)

The Best Deer Feeders (It’s Time To Attract More Deer!)

Are you a wildlife enthusiast? Deer hunter? Or just an animal lover? Well, if you are any of those, a deer feeder is an important equipment you will need. Deer feeders offer a place for deer to come and eat. In line with this, you can feed the wildlife and at the same time detect the deer’s lifestyle patterns. The information can give support to the user’s hunting strategies and give better chances to a perfect timing for a great hunting experience.

In our discussion, you’ll be able to see and compare the different deer feeders and their pros and cons.

Product Name

Price

Score

Moultrie Tripod Feeders

$$$$

93/100 View Product

Redneck Outdoors T-post Gravity Feeder

$$$

95/100 View Product

Moultrie 30 Gallon Easy-Lock Tripod Deer Feeder

$$

90/100 View Product

Deer and Livestock Feeder By Zenature

$$

94/100 View Product

Moultrie 30 Gallon Easy-Lock Tripod Deer Feeder

$$$$

98/100 View Product

Note:

Identify your specific feeder needs and do a thorough research for the right feeder. This may help you save a couple of bucks. Make sure that you choose the right feeder for your personal preference and needs. Also, before jumping in with the deer feeder machine, it’s also important to have a little bit of background about the deer.

Deer in a nutshell

best deer feeder motor

De​er are herbivore animals, so they eat plants such as grass, corns, and leaves (Check Best Deer Baits). Together with this, it is important to take note that they must have to eat crude protein to maximize growth. The feed also needs to contain basic minerals such as calcium and phosphorous.

Deer are found in different places. They are mostly living in wetlands, rainforest, grasslands, and mountains. They can also be located near urban settings. They travel in groups called a herd. They are active throughout the day to find food and water. If you are a hunter, you’ll probably use a deer feeder machine to lure a deer or a herd of deer into your location. On the other hand, if you’re an animal lover, you’ll need this deer feeder to feed a herd of deer in big amounts or by batch. This is most helpful during winters because consistent feeding using a deer feeder machine can greatly help deer survive cold temperatures.

Deer Feeder Placement and Site Necessities

best deer feeder timer

It is important to know the location where the deer feeder can be placed. A strategic location can significantly affect the success of your intention with the feeder whether it’s for hunting or just simply feeding the deer. Site necessities are also important in maintaining the feeder site. Here are some factors that must be considered to plan where you will place your deer feeder machine:

1.) Propinquity or Proximity to Water

It is advisable that the deer feeder machine is placed near a body of water for the deer to drink water. The nearer the deer to this kind of resources makes the site better for the deer to also utilize natural resources.

2.) Truck Accessibility

You need access to the feeding site, and it would be helpful if your truck or AUV can easily access the feeding site for hunting or visiting purposes. Inaccessible sites may make it difficult to work around and use the feeder to its full potential

3.) Availability of other food sources in the area

This factor is very crucial because if a feeder is placed near other food sources, chances are the feeder will attract little to no deer at all. Just imagine your deer feeder machine placed next to a 300-hectare crop field. Therefore, place your feeder in a place where you can monopolize.

4.) Low-anxiety areas

Deer shouldn’t have anxiety when accessing the food feeder machine. It shouldn’t be out in the open because it might be stolen by someone passing by and it will make the deer anxious if the feeder can be easily seen by people passing by. It will help if the feeder is placed in a secluded and low anxiety areas to get better success

It is also of importance to know the site necessities in setting up where your machine should be placed. The ideal set-up for a feeder site requires trail cameras, mineral blocks, and scrapes because it adds to the usability and decoration of the site. The site should also consider animals that can be of nuisance to the area such as squirrels, raccoons and wild boars because they can hamper the operation of the deer feeder machine.

Watch this video to know how to select the right location for a deer feeder.

A Quick Buying Guide Before Buying A Deer Feeder

Deer feeders differ in shapes and sizes. However, the design should be one of the main factors to be considered before buying a feeder. Choose the right feeder with the information you are to be equipped with. These other factors should also be taken into consideration:

1.) Accessibility

best deer feeder times

Inaccessibility would defeat the purpose of buying a feeder as the deer won’t have access to the food. Deer definitely won’t come back, and the feeder would be as good as useless. Easy access is a two thumbs up but not too much access that it becomes available for all other animals besides the deer.

2.) Assembly and Installation

best deer feeder setup

Easy assembly of feeders is recommended. Feeders that are burdensome to assemble and install could lead to not being able to use the feeder to its full use and potential. It could also cause harm to the deer, and the installer as mistake and error in assembly can happen. Read the instructions well and ask for help if needed.

3.) Comfort

best deer feeder for the money

The deer must feel comfortable while eating from the feeder because any slight discomfort might shoo the deer away. The size, style, and model will all be useless if the deer feel uncomfortable. It will begin to search for another food source with more comfort than your deer feeder.

4.) Security

best deer feeder reviews

The corn from the feeder could be eaten by animals like raccoon, squirrels and other woodland animals, leaving no food for the deer. The deer feeder must be secured and ensure that no other animals besides the deer can use the feeder. It will be such a waste if all the food gets finished by other animals and still, there are no deer in sight.

5.) Cost

best automatic deer feeder

Spending too much on a feeder is not advisable as there are more affordable ones available in the market. Some feeders cost a lot of money because of certain features that aren’t even of necessity. Choose the right feeder with the right amount that pays well for its features and functions.

Top Five Best Deer Feeders Reviews In The Market Now

1.) Moultrie Tripod Feeders

61JQzLPSvaL. SL1500

Via: Amazon.com

The first entry on our list is recommended for users who want to be in control over the feeding times. This versatile feeder has programmable settings that allow the user to decide the how much and when to feed. This product has specs which can be durable on its own while at the same time withstanding knock backs from the wind. It is easy to setup because of its Moultrie Quick Lock Technology; which makes assembly a piece of cake.

Moultrie Tripod Feeders also offers a feed level estimator which is very useful in determining when to refill the feeder. It also has a battery indicator and external power port. However, one (1) 6-volt battery is required but does not come with the feeder. Nevertheless, the battery is low-priced and lasts for up to a year.

Pros

  • Mid-range price
  • Includes a built-in varmint guard
  • Metal feeder feet, metal spin plate, and funnel included
  • Has a low center of gravity and harder for animals to knock over
  • Holds about 150 pounds of corn
  • Wind resistant metal spin

Cons

  • Setup instructions are complicated
  • Difficulty in finding another battery that fits in the battery compartment
  • Cheap material used
  • Needs batteries to run and battery doesn’t come with the feeder
  • No protection from other woodland animals since it is not a metal feeder

[amazon box=”B01BE3EURU” description=” “]

2.) Redneck Outdoors T-post Gravity Feeder

71uKm9pB3VL. SL1000

Via: Amazon.com

Versatile and adjustable, this feeder suits users that have different preferences. This product is more intended and recommended for mature deer because of its height. It is built well and easy to set up as the user only needs to strap or mount it. This product’s weight capacity can hold 80 lbs. of corn. It is easy to attract deer and save time at the same time.

Redneck Outdoors T-post Gravity Feeder is made from tough heavy duty polyethylene and is designed to mount or be strapped to a tree or a post. It is ideal for rainy places as this product is designed to keep the food from getting soaked and moldy during the rain.

Pros

  • V-Groove in back intended to fit T-post perfectly
  • Easy to set up
  • Adjustable height to bottom of feeding tube
  • Low maintenance
  • Protection from harsh weather conditions

Cons

  • Accessibility of other woodland animals to the horizontal nozzle
  • Takes time for deer to get used to it probably a minimum of 3 weeks

[amazon box=”B00DPT3YAG” description=” “]

3.) Moultrie 30 Gallon Easy-Lock Tripod Deer Feeder

31jwo2KcBgL

Via: Amazon.com

Our third entry is ideal for users with a problem of feeling strained while filling up the feeder. This feeder is easy to fill with its Easy-Lock feature. The Quick-Lock design feature enables fast and easy assembly with no tools needed as this is one of the most prevalent problems of deer feeders.

Moultrie 30 Gallon Easy-Lock Tripod Deer Feeder also features a programmable digital timer and is protected by a weather-resistant box. The programmable digital timer allows you to control the feeding time and level. It is easy to use and understand even for those who are not too familiar with technology. This feeder is also perfect for places with extreme weather conditions. This product is equipped with a spin cast feeder that helps guide food out of the feeder which provides convenience and comfort for the deer.

Pros

  • Comes with a programmable digital timer
  • Good weight capacity that holds up to 200 lbs.
  • Equipped with a weather-resistant box
  • Easy to fill with Ease-Lock feature
  • Customizable feed dispense time
  • Built-in battery indicator
  • Battery lasts for a long time

Cons

  • None

[amazon box=”B000VE6L80″ description=” “]

4.) Moultrie 30 Gallon Easy-Lock Tripod Deer Feeder

61JQzLPSvaL. SL450

Via: Amazon.com

Our fourth entry is ideal for users with a problem of feeling strained while filling up the feeder. This feeder is easy to fill with its Easy-Lock feature. The Quick-Lock design feature enables fast and easy assembly with no tools needed as this is one of the most prevalent problems of deer feeders.

Moultrie 30 Gallon Easy-Lock Tripod Deer Feeder also features a programmable digital timer and is protected by a weather-resistant box. The programmable digital timer allows you to control the feeding time and level. It is easy to use and understand even for those who are not too familiar with technology. This feeder is also perfect for places with extreme weather conditions. This product is equipped with a spin cast feeder that helps guide food out of the feeder which provides convenience and comfort for the deer.

Pros

  • Comes with a programmable digital timer
  • Good weight capacity that holds up to 200 lbs.
  • Equipped with a weather-resistant box
  • Easy to fill with Ease-Lock feature
  • Customizable feed dispense time
  • Built-in battery indicator
  • Battery lasts for a long time

Cons

  • None

[amazon box=”B00ASLC5VS” description=” “]

5.) Deer and Livestock Feeder By Zenature

71vm%2BuznYAL. SL1500

Via: Amazon.com

Featuring a modest size and height, this feeder is perfect for users that seek feeders that aren’t too small or too large and just the right size. It can be used by medium to large-sized deer. It takes the deer a day or less to approach it. This product also wins in the simplicity aspect. It comes with a simple and pleasant appearance, attracting more deer. Its bottom is removable for easy cleaning.

Deer and Livestock Feeder By Zenature is simply made out of white pine wood and is assembled into a trough-style feeder. Deer are more attracted to it as it looks more approachable due to its natural component. To the deer, this feeder may seem to be just part of nature. Aside from its intended function, it can also be used for gardening purposes.

Pros

  • Affordable price
  • Holds up well against weathering factors
  • Natural components make it more attractive to deer
  • Low maintenance

Cons

  • Difficulty in assembly
  • Not well constructed and easy to knock over
  • Easy access for animals other than deer
  • Can only hold up to 25 lbs. of corn

[amazon box=”B015X65SRK” description=” “]

Verdict

Overall, the difficulty of assembly and installation has been the downside of most products. Nevertheless, Moultrie 30 Gallon Easy-LockTripod Deer Feeder has an indubitable advantage compared to the other feeders because of its commendable features while still being easy to assemble. This product is certainly on top of the game because of its good weight capacity, automated features and all other good features aforementioned while being easy to assemble.

If there is still an entry you think I should include on this list, don’t hesitate to share it in the comment section below. In the meantime, make up your mind and go to the nearest deer feeder shop to start an enjoyable experience with your new product!

Filed Under: Hunting 09:30 by Kevin Steffey

  • « Previous Page
  • 1
  • …
  • 14
  • 15
  • 16
  • 17
  • 18
  • …
  • 49
  • Next Page »
  • AffioraTool Privacy Policy
  • AffioraTool
  • Best Shooting Rest Reviews For A Perfect Hunting – Best Shooting Rests Reviews
  • Hunting Safety: 5 Best Treestand Safety Harnesses Reviewed
  • How Fast Can A Deer Run – How Hard Would It Be To Catch A Frightened Deer On The Run
  • Rice Bran for Deer- How to Effectively Use Rice Bran to Attract a Deer?
  • The Best Reloading Scale for Consistent Accuracy
  • Which Shotgun Choke Is The Most Open?
  • 17hmr vs 22lr: Which one Should You Use?
  • 5 Top Coyote Hunting Dogs That Are Proven To Be Tremendous Hunters

DMCA.com Protection Status

Deerhuntingfield.com is a participant in the Amazon.com Services LLC Associates Program, an affiliate advertising program designed to provide a means for sites to earn advertising fees by advertising and linking to Amazon.com. Additionally, deerhuntingfield.com participates in various other affiliate programs, and we sometimes get a commission through purchases made through our links.